
Updated Nov 5, 2026
macOS
GetPublicIP for Mac connects your Mac to your public IP address. It downloads its configuration for you, lets you manage your port mappings from the app, and keeps itself in step with your dashboard. It runs on macOS 15 Sequoia or later, on Apple silicon and Intel Macs.
This app is in beta. If something doesn't work, contact us and tell us what happened.
GetPublicIP for Mac (Beta)
Download and install
- Download GetPublicIP.dmg.
- Open it and drag GetPublicIP into the Applications folder. It has to run from there: macOS only runs network extensions for apps in Applications.
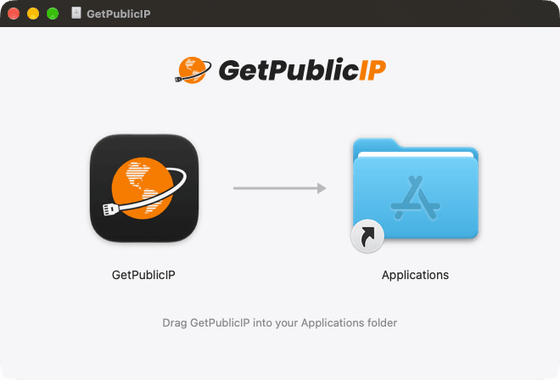
- Open GetPublicIP from Applications. The app is signed by GetPublicIP Limited and notarized by Apple. macOS asks once whether to open an app downloaded from the internet: click
Open.
Allow the network extension
The tunnel runs as a network extension, which macOS asks you to approve once. Until you do, the app shows the steps at the top of its window:
- Click
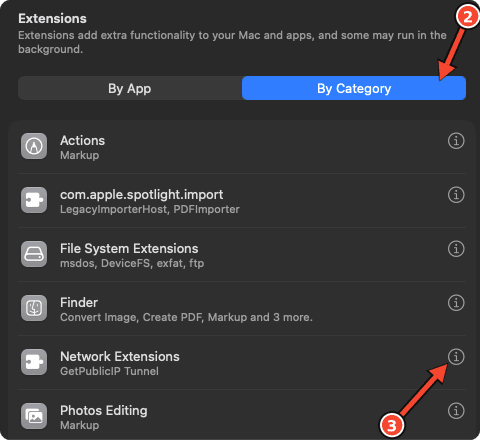
Open System Settings. It opens General › Login Items & Extensions. - Scroll down to Extensions and click
By Category. - Click the Info button (ⓘ) next to Network Extensions.
- Turn on the switch next to GetPublicIP. GetPublicIP Tunnel is written under its name.
- Click
Done.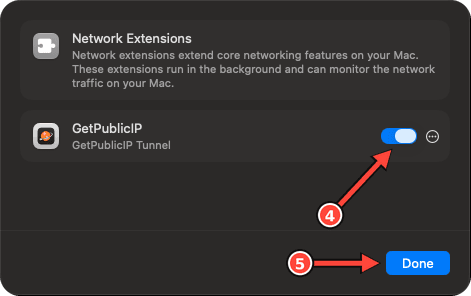
The tunnel can't connect until the extension is on.
Sign in with your API key
The app signs in with the API key of the IP address you want to use. If you don't have one yet, see Create an API Key.
- Paste your API key into the app and click
Sign In. - The first time, macOS asks to allow GetPublicIP's VPN configuration: click
Allow.
The app downloads the address's configuration and connects. There's no config file to import.
Status tab
The Status tab shows your IP address's name, its public IPv4 and IPv6 addresses, its location and status, the tunnel's latest handshake and the traffic sent and received.
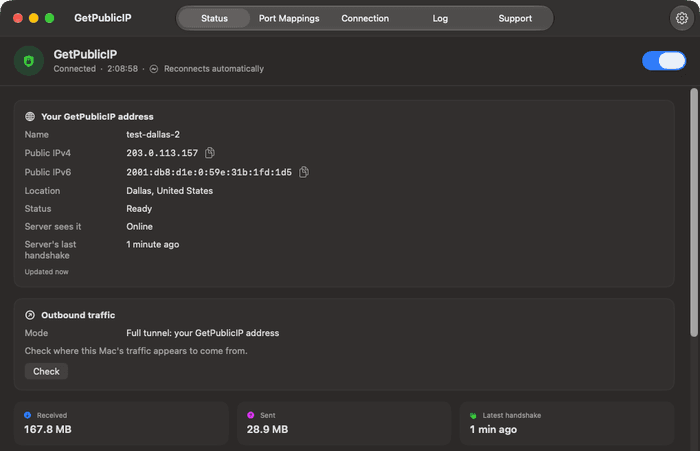
Click Check to see which address your Mac's traffic is leaving from right now. In Full tunnel it's your GetPublicIP address; in Split tunnel it's your normal connection's.
If the tunnel is up but nothing has come back from our server for over three minutes, the tab says No response from the server. See Troubleshooting.
Port Mappings tab
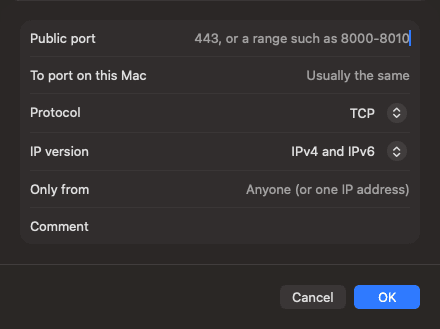
Use Add…, Edit… and Remove to manage your port mappings, then click Save. Revert discards changes you haven't saved. While our server applies a change, the tab shows Applying changes on the server….
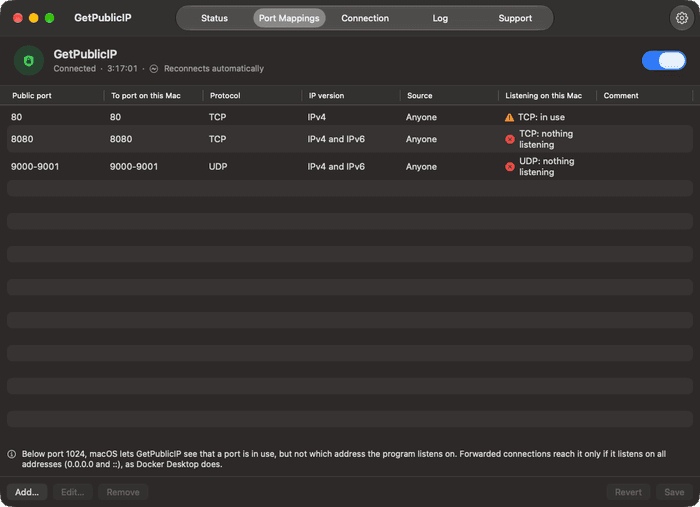
Each mapping has a public port, an internal port, a protocol, an IP version, an allowed source and a comment. Leave the internal port empty to use the same port as the public one, and leave the allowed source empty to accept connections from any address.
The Listening column checks whether something on your Mac accepts connections on each internal port:
listening on all addresses: forwarded connections can reach it.only on 127.0.0.1 or ::1, which forwarded connections never reach: the program only accepts connections from this Mac. Set it to listen on all addresses (0.0.0.0and::).in use: for ports below 1024. Something on your Mac is using the port, but macOS doesn't let the app check which address it listens on, and a note under the table says so. Forwarded connections reach it only if it listens on all addresses (0.0.0.0and::). Docker Desktop does; for anything else, check its settings.nothing listening: start the program, or check that its port matches the internal port.connect to check: the tunnel is off, so there's nothing to check against yet.
macOS doesn't let sandboxed apps like this one list open sockets, so the column can't name the program the way GetPublicIP for Windows does.
There are no firewall rules to add. The macOS firewall is off unless you've turned it on, and it works per app, not per port. See Troubleshooting if it's on.
Connection tab
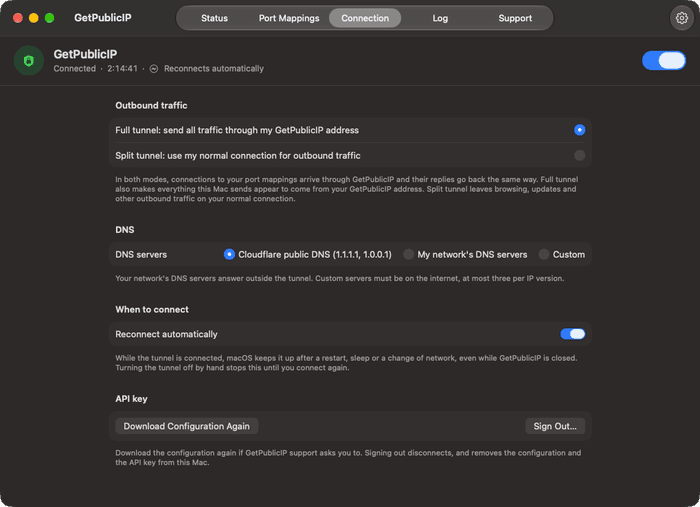
When to connect
With Reconnect automatically on, macOS keeps the tunnel up after a restart, sleep or a change of network, even while GetPublicIP is closed. Turning the tunnel off by hand stops this until you connect again.
Outbound traffic
- Full tunnel: send all traffic through my GetPublicIP address. Everything your Mac sends leaves from your GetPublicIP address. This is the default.
- Split tunnel: use my normal connection for outbound traffic. Browsing, updates and other outbound traffic use your own connection.
In both modes, connections to your port mappings arrive through GetPublicIP, and their replies go back the same way. Switching modes restarts the tunnel.
There's no kill switch on the Mac. The one macOS provides for VPN apps drops incoming TCP connections after their first packet, which would break every TCP port mapping.
DNS servers
This setting only applies in Full tunnel. Split tunnel always uses your network's DNS servers.
- Cloudflare public DNS: the default.
- My network's DNS servers: lookups use your network's servers and leave outside the tunnel.
- Custom: enter up to three public DNS servers per IP version, then click
Apply. A local DNS server, such as a Pi-hole or your router, can't be used here.
API key
- Download Configuration Again: fetch a fresh copy of the configuration, if our support asks you to.
- Sign Out…: disconnect, and remove the configuration and the API key from this Mac. Your IP address and its port mappings stay as they are.
Log tab
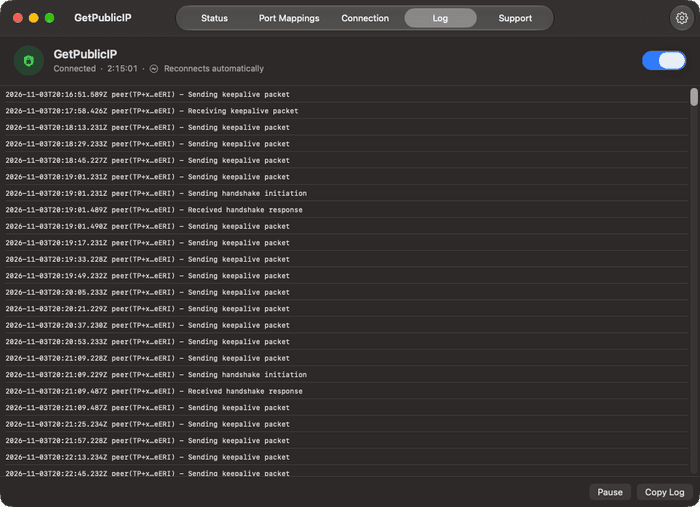
The Log tab lists what the tunnel has been doing, such as connecting and handshakes with our server.
Support tab
If something isn't working, click Create Report, then Copy Report, and paste it into your message to contact us. The report covers the tunnel, your port mappings and what's listening on them, your DNS, other VPNs, your network routes and the recent log.
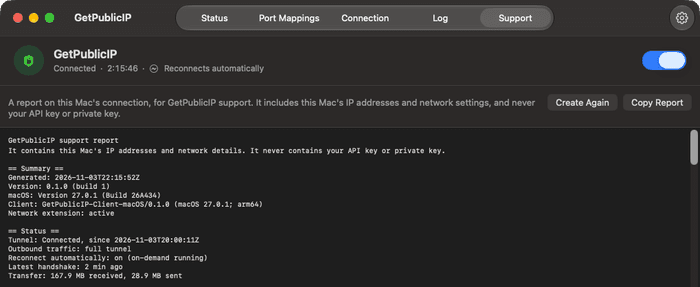
It includes your Mac's IP addresses and network settings. It never includes your API key or the tunnel's private key.
Menu bar
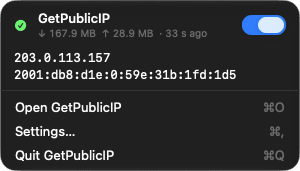
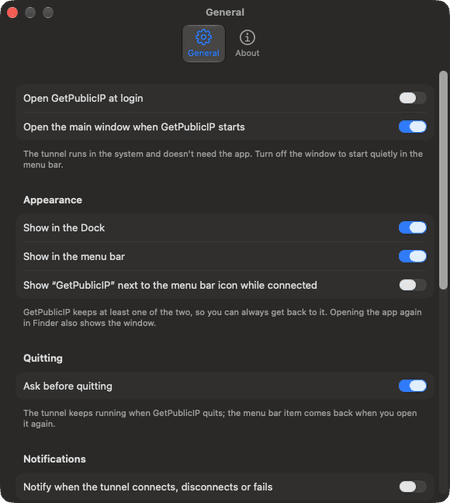
The GetPublicIP icon in the menu bar shows whether the tunnel is connected and gives you your public addresses, the tunnel switch and the app's window. The tunnel keeps running when you quit GetPublicIP. Settings › General decides whether the app opens at login and whether it appears in the menu bar, the Dock or both.
Command line
GetPublicIP for Mac includes a getpublicip command that uses the same commands as the Linux client. It's off until you turn it on in Settings › General › Command line › Allow the getpublicip command. Settings shows the command that links it onto your PATH:
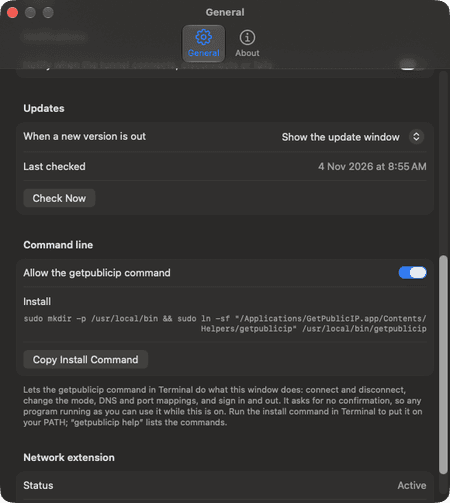
sudo mkdir -p /usr/local/bin && sudo ln -sf "/Applications/GetPublicIP.app/Contents/Helpers/getpublicip" /usr/local/bin/getpublicip
Some commands:
getpublicip status # the address, the tunnel and where your traffic leaves from
getpublicip up --mode split # connect in split tunnel
getpublicip ports # forwarded ports and what listens behind each one
getpublicip ports add 8443 # forward TCP 8443 on IPv4 and IPv6
getpublicip doctor # check the install, the tunnel, the firewall and every port
The command asks for no confirmation. While it's on, any program running as you can use it to connect, disconnect, change your port mappings or sign out. Turn it on only if you use it. It never takes the API key as an argument: getpublicip login asks for it.
Updates
The app checks for updates by itself and shows you when one is ready to install. The Updates section in Settings sets what happens when a new version is out, and Check Now checks straight away.
Uninstall
- In the Connection tab, click
Sign Out…. This removes the configuration and the API key from your Mac. - Open System Settings › General › Login Items & Extensions. Under Extensions, choose By Category and click the Info button (ⓘ) next to Network Extensions. Click the actions button (…) next to GetPublicIP's switch and choose Delete Extension. Click
Uninstall, then enter your Mac's password. - Quit GetPublicIP from its menu bar icon, then move it from Applications to the Trash.
macOS is meant to remove an app's network extension when the app goes to the Trash, but macOS 15.3 and macOS 26 were both reported to leave it behind, so step 2 removes it first. To check, run systemextensionsctl list in Terminal. If a com.getpublicip.mac line still says [activated enabled], the extension is still installed.
Docker Desktop
If your service runs in a container in Docker Desktop, it sees every visitor as 192.168.65.1 instead of their real address. Your logs show only that address, and anything that acts on a visitor's address inside the container sees one visitor: rate limits, fail2ban and CrowdSec, geo-blocking, and allowlists.
The tunnel isn't the cause. In our test on 3 November 2026 (Docker Desktop 4.96.3, nginx behind a TCP port mapping), the Mac and the container saw the same request differently:
| Where | Address seen for the visitor |
|---|---|
The Mac (lsof -iTCP:80) | the visitor's real address |
| nginx in the container | 192.168.65.1 |
Docker Desktop runs containers in a Linux virtual machine. A Docker process on your Mac holds each published port, accepts the connection and opens a new one into the virtual machine, so the visitor's address is gone before the container sees anything. 192.168.65.1 is Docker's own gateway inside that machine.
No Docker Desktop setting changes this. Docker's request to keep the address, docker/roadmap#157, has been open since 2020. OrbStack has the same limitation (orbstack#710).
A mapping's allowed source still works, because our server applies it before the traffic reaches your Mac.
What to do instead
- Run the service on macOS itself, outside Docker. A program listening on your Mac sees each visitor's real address over IPv4 and IPv6, for TCP and UDP.
- Put a reverse proxy on your Mac, in front of the container. Run it directly on macOS (from Homebrew, for example), point your port mapping's internal port at it, and have it forward to the container. For websites, the proxy passes the visitor's address in the
X-Forwarded-Forheader; set your app to trust that header from the proxy only. For other TCP services, some proxies, HAProxy among them, can pass it with the PROXY protocol, if the service in the container accepts it. Publish the container's port on127.0.0.1only, so nothing can reach it without going through the proxy. This doesn't help UDP.
Publish on IPv4 and IPv6
A port published with an address, such as "0.0.0.0:80:80", makes Docker Desktop listen on IPv4 only, so the IPv6 half of your port mapping is refused. Leave the address out to publish on both:
services:
web:
image: nginx:stable-alpine
ports:
- "80:80" # IPv4 and IPv6. "0.0.0.0:80:80" would be IPv4 only
We tested both forms through a GetPublicIP port mapping: with the address, IPv6 connections were refused; without it, IPv4 and IPv6 both reached the container.
Troubleshooting
The Status tab says No response from the server. The tunnel is running, but our server isn't answering. Check that the network you're on allows outgoing UDP to port 51820; some workplace, hotel and guest networks block it. Another VPN or a security product on your Mac can also block it. If it carries on, contact us.
A port mapping doesn't connect. Check the Listening column on the Port Mappings tab. A program listening only on 127.0.0.1 can't be reached from the internet: set it to listen on all addresses.
The macOS firewall blocks forwarded connections. With "Block all incoming connections" turned on, forwarded connections are blocked too. Turn it off in System Settings › Network › Firewall › Options. With the firewall on but that option off, macOS may ask once whether each program can accept incoming connections: click Allow. The app can't read the firewall's settings, but getpublicip doctor can, and reports them.
Your Mac stops answering after a while. A sleeping Mac answers nothing. Apple's sleep and wake settings are in System Settings › Energy on a desktop Mac: turn on "Prevent automatic sleeping when the display is off". On a MacBook, go to System Settings › Battery › Options and turn on "Prevent automatic sleeping on power adapter when the display is off". A MacBook with its lid closed sleeps unless it's on power with an external display attached.
A UDP service in Split tunnel. A UDP server listening on all addresses would send its replies through your normal connection. The app routes each new client of a UDP mapping through the tunnel as its first packet arrives, so replies leave from your GetPublicIP address. UDP that a service sends first, to an address that hasn't sent it anything, still leaves through your normal connection. To avoid that, make the service listen on the tunnel address the Port Mappings tab shows, or use Full tunnel. TCP services aren't affected.
Another VPN is connected. Disconnect it while you use GetPublicIP. getpublicip doctor names any other VPN that's connected.
Only one device per IP address. Don't use the same API key on another computer or in the Docker image at the same time. Two devices with one key fight over the connection.